If you’ve ever looked at your unfinished basement and felt a mix of excitement and overwhelm, you’re not alone. That blank canvas can be a bit daunting, but transforming it into a functional, cozy space is very much within reach. With a little creativity and some budget-friendly decor, you can bring your basement dreams to life without breaking the bank. This post is designed to inspire you with practical ideas that won’t drain your wallet.
Whether you’re a DIY enthusiast, a parent looking for a play space, or a remote worker in need of a home office, this post is for you. You care about making your home feel complete and welcoming, and the basement is an often-overlooked area that can add value and comfort to your life. I’ve gathered 18 unfinished basement ideas on a budget that actually work. Each idea is simple, affordable, and perfect for creating a space that reflects your style and needs.
From a cozy reading nook to a mini home gym, you’ll discover creative storage solutions and practical tips for a basement makeover. Get ready to roll up your sleeves and dive into these DIY basement transformations that will make your space not just functional, but a joy to spend time in.
Key Takeaways
– Discover 18 affordable ideas tailored for creating a cozy and functional unfinished basement.
– Learn how to implement budget-friendly decor that elevates your basement’s aesthetic without overspending.
– Find out how to set up creative storage solutions to keep your basement organized and clutter-free.
– Get practical tips for various spaces, including playrooms, home offices, and relaxation zones, enhancing your home’s usability.
– Explore simple DIY basement transformations that help you maximize your space while staying within budget.
1. Cozy Reading Nook

Creating a cozy reading nook in your unfinished basement is a wonderful way to escape into your favorite stories. A comfortable chair, perhaps an old bean bag, paired with soft cushions and a small bookshelf can turn a dull corner into a literary retreat. The warmth of a soft blanket adds an irresistible touch, making it the perfect spot to unwind with a book.
To keep costs low, consider repurposing furniture you already own. An old ladder can transform into a charming bookshelf, while a vintage trunk can serve both as storage and a side table. Warm lighting, like a stylish floor lamp or twinkling string lights, will enhance that snug atmosphere.
Key Tips:
– Choose a well-lit corner or near a window for natural light.
– Refresh old furniture with non-toxic spray paint in fun colors.
– Incorporate a small side table for easy access to drinks or snacks.
This nook should inspire relaxation and creativity, providing a peaceful escape from daily life.
Tools and Materials:
– Old armchair or bean bag
– Cushions and a throw blanket
– Bookshelf or crate for books
– Ladder for a creative bookshelf
– Soft lighting like fairy lights or a lamp
DIY Instructions:
1. Clean and prepare your chosen area.
2. Arrange your seating and layer on cushions for comfort.
3. Create your bookshelf using crates or an old ladder.
4. Add soft lighting for that cozy feel.
5. Personalize the space with plants or wall art.
Cozy Reading Nook
Editor’s Choice


2. DIY Game Room

Imagine transforming a section of your basement into a fun DIY game room without breaking the bank! You can upcycle old tables into vibrant game surfaces with just a splash of paint or a colorful tablecloth. This space can become a hub of laughter and friendly competition, perfect for family game nights.
Consider using colorful cushions or bean bags for relaxed seating. Repurposing pallets into low tables or seating adds a unique touch. A few playful posters and a DIY chalkboard wall can bring personality to the room while providing endless entertainment for all ages.
Key Tips:
– Use bold colors to energize the atmosphere.
– Include storage baskets for board games and controllers.
– Design a space that serves both gaming and storage needs easily.
A DIY game room is not only about fun but also creates a gathering place for family and friends that doesn’t strain your wallet.
Tools and Materials:
– Repurposed table
– Blankets and cushions for seating
– Old pallets or crates
– Paint for tables
– Chalkboard paint for a creative wall
DIY Instructions:
1. Choose your main gaming surface, like a table or floor space.
2. Upcycle old furniture for casual seating.
3. Paint walls in playful colors or apply chalkboard paint.
4. Use decorative storage for games and equipment.
5. Add personal touches with posters or wall art.
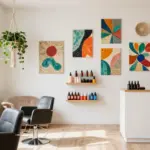
3. Arts and Crafts Zone

If crafting is your passion, designating a section of your basement for an arts and crafts zone can be incredibly fulfilling. Inexpensive shelving units can help organize your materials, while an old desk serves as a spacious craft table for all your projects. This creative corner can become your go-to spot for inspiration and productivity.
Clear storage bins keep supplies organized and visible, making it easier to find what you need. Beautify the walls with inspiration boards or display your finished artworks, which can double as decor. A pegboard is a clever way to keep tools and supplies within reach.
Key Tips:
– Ensure the area is well-lit, whether by natural light or additional lamps.
– Label storage bins for quick access to materials.
– Include a trash bin nearby to maintain a tidy workspace.
Encouraging creativity in this organized zone can turn it into your favorite space in the house.
Tools and Materials:
– Old desk or table
– Shelving units for organization
– Clear storage bins
– Pegboard for tools
– Inspiration board or corkboard
DIY Instructions:
1. Identify the area for your craft zone.
2. Set up your workspace with a desk or table.
3. Organize materials using shelving and bins.
4. Create a pegboard to hang tools and supplies.
5. Add wall space for inspiration and finished artworks.
Cost Breakdown & Budget Planning
Planning your unfinished basement makeover doesn’t have to break the bank. With some thoughtful budgeting, you can create a functional and stylish space. Here’s a detailed guide to help you understand your costs.
Cost Breakdown by Category:
– Materials/Products: Expect to spend between $200 to $2,000 depending on the scope. Paint, flooring, and furniture can vary widely in price.
– Tools/Equipment: If you don’t own tools, budget around $50 to $300. Basic tools like drills, saws, and paintbrushes will get you started.
– Labor/Professional Installation: Hiring professionals can range from $500 to $5,000. Costs depend on the complexity of the project, like electrical or plumbing work.
– Optional Extras: Decorative items such as curtains, rugs, or artwork can add another $100 to $1,000. These are great for personal touches.
Budget Tier Breakdown:
Basic Economy Tier £/€/$
– What’s included: Minimal options like basic paint, a simple furniture arrangement, and DIY shelving.
– Good for: Quick fixes or creating a simple recreational space.
– Limitations: You might miss out on comfort and style, with limited storage and decor options.
Mid-Range Tier ££/€€/$$
– What’s included: This option includes nice paint, decent flooring, and some second-hand furniture.
– Good for: A cozy family space or a hobby area.
– Best value for: Most people looking for a balance of style and function without overspending.
Premium Tier £££/€€€/$$$
– What’s included: High-quality materials, professional installation, and stylish decor elements.
– Good for: Creating a luxurious entertainment area or home office.
– Worth it if: You want a long-lasting, polished look that could add value to your home.
Money-Saving Tips:
– DIY When Possible: You can save a lot by doing the work yourself. Painting, assembling furniture, or even basic carpentry can cut costs significantly.
– Shop Sales and Thrift Stores: Look for discounted items or second-hand furniture. Stores like Habitat for Humanity ReStores often have great deals.
– Repurpose What You Have: Use old furniture with a fresh coat of paint or new hardware. This can breathe new life into tired pieces without hefty spending.
– Plan in Phases: Break your project into smaller parts. Tackle one area at a time to spread out costs over several months.
Where to Splurge:
– Flooring: Invest in durable and stylish flooring. Good flooring not only enhances the space but also withstands wear and tear.
– Lighting: Quality lighting can dramatically improve the ambiance. Consider fixtures that provide good illumination and add style.
– Functional Furniture: Invest in multi-purpose furniture. A good-quality sofa bed or storage ottoman can maximize space and utility.
With this budget guide, you can confidently tackle your unfinished basement. By planning wisely and making smart decisions about where to save and where to splurge, you’ll create a beautiful and functional space without overspending. Happy decorating!
4. Functional Laundry Space

Turning your basement into a functional laundry space can streamline chores and save you time. By installing a folding station from an old table or wooden crates, you can create a handy spot for laundry tasks while also providing storage for baskets and detergents. Adding a curtain or shelves can keep everything organized and out of sight.
Incorporating a foldable drying rack is a great way to maximize your space when not in use. Clear bins or baskets help in sorting clothes, making laundry days feel more manageable. If your budget allows, consider adding some cheerful wall art to brighten the atmosphere.
Key Tips:
– Organize with labeled bins for different types of laundry.
– Use multifunctional furniture to save space and increase efficiency.
– Ensure the area has good lighting to create a pleasant environment.
A well-designed laundry space can change your perspective on chores, making them more enjoyable and efficient!
Tools and Materials:
– Old table or wooden crates
– Curtain or shelves for storage
– Drying rack
– Baskets for sorting
– Wall art or motivational signs
DIY Instructions:
1. Identify the laundry area in your basement.
2. Set up a folding station using a table or crates.
3. Organize with labeled bins and baskets.
4. Install a drying rack that can be stored away.
5. Add personal touches with decor to brighten the space.
Functional Laundry Space
Editor’s Choice


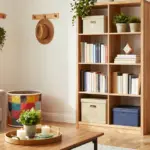
5. Storage and Organization Solutions

Maximizing your basement’s potential is essential for effective storage and organization. Building DIY shelves from reclaimed wood or pallets can create a rustic yet functional display for your belongings. Stackable bins or clear jars help store smaller items neatly out of sight while remaining easily accessible.
Incorporating hooks or pegboards on the walls provides a fantastic way to hang tools, sports equipment, or crafting supplies. An organized space makes it easier to find what you need, resulting in a more pleasant environment overall.
Key Tips:
– Use vertical space by installing shelving or hanging storage solutions.
– Repurpose existing furniture or items for clever storage solutions.
– Regularly declutter to maintain a tidy and efficient area.
A well-structured storage area can transform your unfinished basement into a functional and cozy part of your home.
Tools and Materials:
– Reclaimed wood for shelving
– Stackable bins and jars
– Hooks or pegboards
– Old furniture for repurposing
DIY Instructions:
1. Survey the space and identify areas for shelving.
2. Build or install your shelves using reclaimed wood.
3. Organize smaller items with bins or jars.
4. Hang tools and sports gear on pegs or hooks.
5. Regularly update and declutter your storage systems.
6. Mini Home Gym

Are you ready to stay active without a gym membership? Creating a mini home gym in your basement is a fantastic idea! You don’t need much equipment; a few free weights, a yoga mat, and some resistance bands are all you need to get started.
Utilize a repurposed shelf to keep your gear organized or a small table for water and towels. Hanging mirrors can make the space feel larger while allowing you to check your form. Bright colors and motivational prints on the walls can enhance the energy of your workout space.
Key Tips:
– Ensure enough space for movement and exercises.
– Keep the area well-ventilated to maintain comfort during workouts.
– Include a sound system or speaker to keep you motivated.
With a little creativity, your basement can become your personal training sanctuary!
Tools and Materials:
– Free weights or resistance bands
– Yoga mat
– Repurposed shelving or table
– Mirrors for form checking
– Bright paint or wall decor
DIY Instructions:
1. Choose an area with sufficient space for your workouts.
2. Set up your equipment and organize them neatly.
3. Hang mirrors to create a larger feeling in the space.
4. Decorate the walls with motivational quotes.
5. Ensure the space is well-lit and ventilated.
Did you know a 10×12 ft space can become a functional mini gym with just a few weights, a mat, and resistance bands? Small, budget-friendly setups save money and boost energy—perfect for unfinished basement ideas on a budget.
Mini Home Gym
Editor’s Choice


7. Playroom for Kids

Designing a vibrant playroom for kids in your unfinished basement can be a delightful project! This dedicated space allows for toys, activities, and endless imagination. Using inexpensive rugs adds comfort, while a colorful palette stimulates creativity and playfulness.
Build simple toy storage using crates or boxes to keep things organized in a fun way. Adding wall decals or chalkboard paint can spark excitement and creativity, giving children a canvas to express themselves. A play tent or cushions can create a cozy reading nook or quiet zone within the playroom.
Key Tips:
– Use non-toxic paint and materials that are safe for kids.
– Incorporate interactive elements like a chalkboard wall to engage them.
– Ensure there’s enough open space for movement and play.
Creating a playroom helps contain the mess while providing a vibrant area for fun and growth.
Tools and Materials:
– Colorful rugs for comfort
– Crates or boxes for toy storage
– Wall decals or chalkboard paint
– Cushions or play tents for lounging
DIY Instructions:
1. Select a bright color palette to paint the space.
2. Add rugs for softness and comfort underfoot.
3. Create toy storage using crates or boxes.
4. Decorate with wall decals or paint a chalkboard wall.
5. Introduce soft seating areas for reading or relaxing.
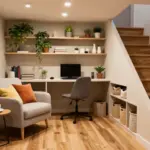
8. Home Office Space

As more people work from home, transforming a corner of your basement into a home office can make a huge difference. Find a quiet spot to set up a small desk or table, paired with a comfy chair that fits your style. An old chair can easily be upcycled with a fresh coat of paint.
Incorporate shelves or cabinets for organization, ensuring your workspace remains clutter-free. Adding decor like plants and artwork can create a motivating and pleasant environment to work in. Good lighting is crucial, so include a quality desk lamp or utilize natural light whenever possible.
Key Tips:
– Choose a calming color palette that promotes focus and productivity.
– Keep it organized with labeled storage bins and files.
– Personalize your space with decor that inspires you and reflects your personality.
A dedicated home office can enhance productivity while remaining budget-friendly.
Tools and Materials:
– Small desk or table
– Comfortable chair
– Shelves or cabinets for storage
– Storage bins for organization
– Desk lamp or good lighting
DIY Instructions:
1. Find a quiet corner for your home office setup.
2. Arrange a desk and chair that fits your aesthetic.
3. Install or place shelves for organization.
4. Organize with labeled bins for easy access.
5. Add personal touches for motivation and inspiration.
Home Office Space
Editor’s Choice


9. Garden Room

Feeling inspired? Consider transforming your unfinished basement into a garden room that brings a touch of nature indoors. This delightful sanctuary filled with greenery can be a wonderful escape, even when the weather isn’t cooperating. Use inexpensive shelving to create vertical plant displays, ensuring good lighting with grow lights or by utilizing natural light sources.
Incorporate hanging plants or small pots on windowsills to create a vibrant atmosphere. A cozy reading corner with a chair and cushions placed among the plants can make it a peaceful retreat for relaxation and enjoyment.
Key Tips:
– Choose low-maintenance houseplants that thrive indoors.
– Incorporate adequate lighting for optimal plant growth.
– Use colorful pots to add character and charm.
A garden room can be a joyful escape, bringing a refreshing touch of nature into your home year-round!
Tools and Materials:
– Shelves for plant displays
– Grow lights for proper illumination
– Variety of indoor plants
– Hanging pots or window planters
DIY Instructions:
1. Identify the best location in your basement for gardening.
2. Set up shelves for displaying plants vertically.
3. Install grow lights if natural light is limited.
4. Arrange plants creatively on shelves and in pots.
5. Create a cozy reading corner amidst the greenery.
10. Home Theater Setup

Want to enjoy movie nights at home? Designing a home theater in your basement can be an exciting project that fits your budget. Start with a comfy sofa or a collection of bean bags arranged to face a wall where a projector screen can be hung or even a blank wall.
Create a DIY popcorn station using an old cart or cabinet to hold snacks and drinks. Dim lighting with fairy lights or lanterns can set the mood for a fantastic cinematic experience. Don’t overlook the sound system; even budget speakers can enhance your movie enjoyment significantly.
Key Tips:
– Choose comfortable seating that fits the space well.
– Use curtains or shades to control natural light during viewing.
– Decorate the walls with movie posters for that authentic cinema feel.
Creating a home theater is a fun way to spend quality time with family and friends, all from the comfort of your basement.
Tools and Materials:
– Comfy sofa or bean bags
– Projector and screen or blank wall
– Old cart or cabinet for snacks
– Soft lighting options
– Speakers for audio
DIY Instructions:
1. Designate a space in your basement for your home theater.
2. Arrange seating to face the screen or wall.
3. Set up a projector or screen, ensuring proper positioning.
4. Create a snack station using an old cart.
5. Add soft lighting and decorate with movie posters.
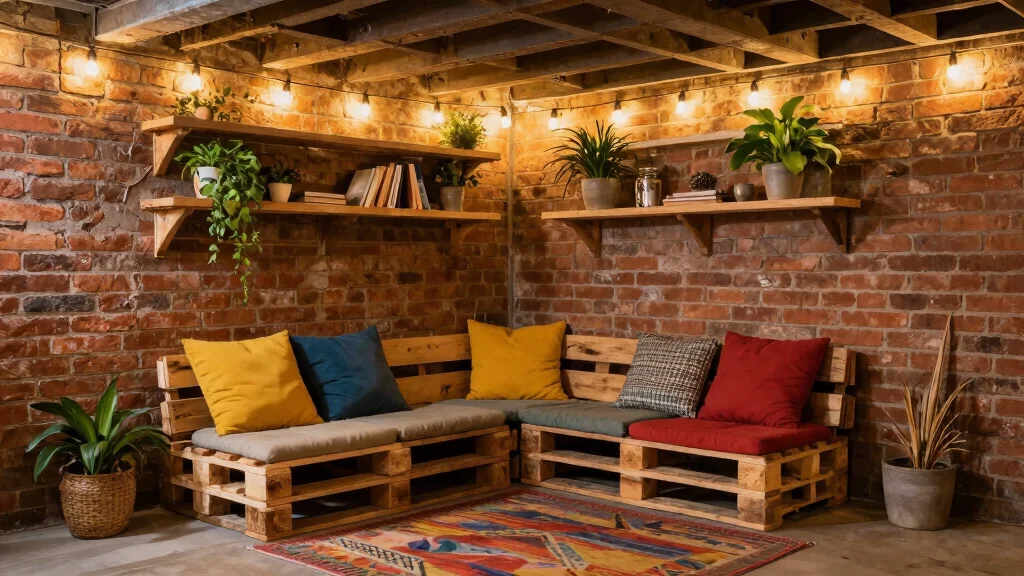
11. Rustic Bar Area

Creating a rustic bar area in your basement is a fantastic way to entertain guests and enjoy social gatherings. Use an old table or a reclaimed piece of furniture as your bar top, stocked with your favorite drinks and glassware for easy access.
Incorporating wooden crates or repurposed pallets can help create shelving for bottles and snacks. Decorate the space with rustic touches like string lights, mason jars, and wooden stools for seating. This cozy bar area can transform your basement into a fun social hub without costing a fortune!
Key Tips:
– Choose a color scheme that complements your home decor.
– Add a chalkboard for drink specials or notes.
– Keep the area organized and clutter-free for a polished look.
A rustic bar not only enhances your entertaining options but also brings a unique charm to your unfinished basement.
Tools and Materials:
– Old table or reclaimed wood for the bar
– Crates or pallets for shelving
– Jars and glassware for drinks
– Wooden stools for seating
DIY Instructions:
1. Set up the bar area with a sturdy tabletop.
2. Create shelves using crates or pallets for storage.
3. Stock with your favorite drinks and accessories.
4. Decorate with rustic decor like string lights and jars.
5. Ensure organization for a tidy and welcoming appearance.
Fun fact: When you lean into unfinished basement ideas on a budget, a rustic bar built from a reclaimed table and pallets can slash entertainment costs by up to 40%. Add string lights and mason jars, and your space instantly feels warm, welcoming, and ready for hosting.
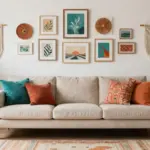
12. Vintage-inspired Lounge

For a touch of nostalgia, consider designing a vintage-inspired lounge in your basement. Look for retro furniture pieces at thrift stores, mixing and matching them to create a unique yet cohesive look. Bright patterns and bold colors evoke a sense of fun and liveliness, making the space inviting for family and friends.
Use area rugs to define spaces and vintage art to add personality and stories to your decor. Soft lighting and quirky accessories, like record players or vintage games, can create a comfy atmosphere for relaxation and entertainment.
Key Tips:
– Embrace mismatched furniture for an eclectic feel.
– Add colorful area rugs to warm the space.
– Incorporate elements from different eras for added charm.
A vintage lounge will not only impress your guests but also provide a stylish retreat for relaxing or entertaining.
Tools and Materials:
– Vintage furniture pieces from thrift stores
– Patterned area rugs
– Vintage art and decor
– Soft lighting options like table lamps
DIY Instructions:
1. Source vintage furniture to populate your lounge space.
2. Arrange furnishings creatively to define areas and comfort zones.
3. Add colorful rugs for warmth and style underfoot.
4. Hang vintage art to enhance the character of the decor.
5. Incorporate soft lighting for a cozy ambiance.
13. Creative Workshop Space

Unleash your creativity by turning your basement into a workshop space designed just for you. Whether you’re into woodworking, crafting, or DIY projects, a dedicated area can keep your materials organized and inspire you to create! Use sturdy workbenches or tables as your primary surface area for all your projects.
Incorporate wall storage for tools and supplies to make everything easily accessible. Bright lighting is essential, and adding inspiration boards can keep your creativity flowing.
Key Tips:
– Keep the workspace clutter-free to boost productivity.
– Use clear bins for visual organization of supplies.
– Establish a comfortable seating area for those times you need to take a break.
A workshop space is where your ideas can come to life, making your unfinished basement a functional and fun area.
Tools and Materials:
– Workbench or sturdy table
– Wall storage for tools
– Clear bins for supplies
– Good lighting options
DIY Instructions:
1. Designate a specific area for your workshop.
2. Set up a workbench for your projects.
3. Organize tools and supplies using wall storage.
4. Incorporate bins for easy access to materials.
5. Add lighting and an inspiration board to motivate your creativity.
Fun fact: dedicating a 6×8 ft workshop in an unfinished basement can boost DIY project output by up to 40%. With sturdy workbenches, wall storage, and bright lighting, unfinished basement ideas on a budget finally become real, practical spaces.
14. Budget-Friendly Art Studio

Transform your basement into a budget-friendly art studio where you can explore your creativity freely! Use an old table or easel as your primary work surface, while keeping supplies organized in containers or baskets. A pegboard can serve as a versatile option to hang tools and paint, ensuring everything is within reach.
Installing good lighting will highlight your artworks and create a great environment for painting or drawing. Display your finished art pieces as decor to showcase your talent and beautify the space.
Key Tips:
– Choose vibrant colors for paint and decor to inspire creativity.
– Keep it organized for a smooth workflow.
– Allow natural light to enhance your creative process.
An art studio can foster inspiration and relaxation, allowing you to express yourself completely!
Tools and Materials:
– Old table or easel
– Containers or baskets for organization
– Pegboard for tools
– Good lighting options
DIY Instructions:
1. Set up a work surface for your art projects.
2. Organize supplies using baskets or containers for easy access.
3. Install a pegboard for hanging tools and materials.
4. Ensure good lighting for detailed work.
5. Decorate with your own art to personalize the space.
15. Indoor Garden Oasis

Transform your basement into an indoor garden oasis, where you can enjoy nature year-round. Use old furniture or racks to create vertical garden displays, allowing you to maximize your space creatively. Select low-light plants that thrive indoors, and incorporate grow lights where necessary to ensure your plants flourish.
Add seating among the greenery, like a small bench or a couple of chairs, creating a tranquil retreat. Colorful pots and decorations can inject life into the space, making it a refreshing escape from everyday life.
Key Tips:
– Choose plants that thrive indoors and suit your environment.
– Incorporate a mix of textures and colors for visual interest.
– Keep your garden tidy with organized pots and displays.
An indoor garden oasis will beautify your basement while elevating your mood and improving air quality!
Tools and Materials:
– Old furniture for plant displays
– Racks for vertical gardening
– Low-light indoor plants
– Grow lights
DIY Instructions:
1. Set up furniture or racks for displaying plants.
2. Choose appropriate indoor plants for the space.
3. Incorporate grow lights where necessary for optimal growth.
4. Arrange pots and decorations for visual appeal.
5. Create seating for a peaceful atmosphere.
16. Rustic Dining Area

If you love hosting gatherings, consider creating a rustic dining area in your basement. Use a large table made from reclaimed wood, surrounded by mismatched chairs for a charming, homey feel. This setup creates an inviting space where friends and family can come together around meals.
Decorate with warm lighting, like hanging lanterns or string lights, to enhance the atmosphere. Fill the table with simple centerpieces made from jars or fresh flowers to complement the rustic vibe. This dining area can serve as the perfect backdrop for memorable meals and gatherings.
Key Tips:
– Use natural materials to enhance the rustic charm of the space.
– Create a simple yet beautiful table setting for warmth and comfort.
– Ensure the area is well-lit for evening gatherings.
A rustic dining area makes your basement an enjoyable gathering spot, showcasing your love for good food and good company.
Tools and Materials:
– Large table made from reclaimed wood
– Mismatched chairs for seating
– Hanging lanterns or string lights for ambiance
– Jars or flowers for table decor
DIY Instructions:
1. Set up a large table designated for dining.
2. Choose chairs that are comfortable and visually appealing.
3. Hang lights to create a warm and inviting atmosphere.
4. Decorate the table with simple yet elegant centerpieces.
5. Ensure enough space for movement and enjoyment.
Rustic Dining Area
Editor’s Choice


17. Relaxation Zone with Spa Vibes

Crafting a relaxation zone with spa vibes in your basement can provide a much-needed escape from everyday stress. Soft lighting, calming colors, and comfortable furniture set the perfect scene for unwinding after a long day. Incorporate elements like a small water feature, indoor plants, and soothing scents from candles or essential oils to enhance the ambiance.
Adding comfortable seating options, such as lounge chairs or bean bags, will further promote relaxation. Personal touches, like artwork or inspirational quotes, can make the space feel like your personal retreat, encouraging you to take a moment for yourself.
Key Tips:
– Choose calming colors like soft blues or greens to promote tranquility.
– Incorporate sound elements like soft music or a water feature for a serene atmosphere.
– Keep the space clutter-free to maintain a peaceful environment.
A relaxation zone can be a haven where you recharge and unwind, enhancing your well-being.
Tools and Materials:
– Soft lighting options
– Comfortable seating
– Indoor plants or water feature
– Candles or essential oils for calming scents
DIY Instructions:
1. Set up seating in a cozy corner of the basement.
2. Use soft lighting to create a calming atmosphere.
3. Decorate with soothing colors and personal touches.
4. Incorporate elements like plants or a small water feature for added tranquility.
5. Include soothing scents that enhance relaxation.
18. Seasonal Decor Storage

Utilizing your basement for seasonal decor storage can help keep your home organized and neat. Instead of cluttering other areas, dedicate a section for all your holiday decorations and seasonal items. Clear bins or labeled boxes can keep everything sorted and easily accessible, making transitions from season to season a breeze.
Use shelving to maximize vertical space, allowing you to stack bins neatly without consuming too much room. Adding hooks for seasonal items like wreaths or garlands is a practical way to keep everything organized and ready for use.
Key Tips:
– Color-code bins by season for quick recognition.
– Use shelving to maximize storage potential and efficiency.
– Regularly declutter and donate items you no longer use to maintain order.
A well-organized seasonal decor storage area streamlines your seasonal transitions, ensuring your home remains tidy and welcoming year-round!
Tools and Materials:
– Clear bins or labeled boxes
– Shelving units for organization
– Hooks for hanging decorations
DIY Instructions:
1. Choose a specific area for seasonal decor storage in your basement.
2. Sort decorations by season, using clear bins or boxes for easy identification.
3. Install shelving to keep everything organized and accessible.
4. Use hooks for hanging items like wreaths for easy access.
5. Regularly reassess and declutter your collection to keep it manageable.
Conclusion

Transforming an unfinished basement into a functional and beautiful space is entirely possible on a budget! From cozy reading nooks to vibrant playrooms and organized storage, the ideas shared can help you maximize every inch of your space. With a little creativity and some DIY spirit, you can truly make your basement a valuable part of your home. Don’t hesitate to get started on your transformation journey today!
Remember, every step you take towards enhancing your home is a step towards increased comfort and functionality. So, what are you waiting for? Roll up your sleeves and let your creativity flow!
Note: We aim to provide accurate product links, but some may occasionally expire or become unavailable. If this happens, please search directly on Amazon for the product or a suitable alternative.
This post contains Amazon affiliate links, meaning we may earn a small commission if you purchase through our links, at no extra cost to you.
Frequently Asked Questions
Question: What are the best unfinished basement ideas on a budget that actually work?
Transforming an unfinished basement on a budget is totally doable with a few focused steps. Start by choosing budget-friendly decor and upcycled furniture to define zones without breaking the bank. For example, build a coffee corner from a repurposed pallet coffee table and crate storage, or mount pegboard for affordable wall storage.
Brighten the space with inexpensive paint or concrete stain in light tones and use white or light neutrals to reflect light. Layer in creative storage solutions like modular shelving and wall-mounted cabinets to keep clutter hidden and accessible.
Implement simple DIY basement transformations such as installing removable wall panels, curtain dividers for zones, and energy-efficient LED lighting. Small upgrades like weatherproof seals and moisture control are essential affordable home improvements that pay off long-term.
With these ideas, you can achieve a full basement makeover on a budget while keeping the space functional and inviting.
Question: How can I maximize storage in an unfinished basement on a budget?
Get creative with vertical space and modular, low-cost storage. Start with creative storage solutions such as wall-mounted racks, pegboard tool organizers, and stackable bins to keep items sorted. Use tall shelving and ceiling-mounted storage to free floor space, perfect for a budget-friendly basement makeover.
Repurpose shipping pallets into wall shelves or a divider, and consider under-stair drawers or a built-in bench with hidden storage. Label containers and group items by category so you can find things quickly, making DIY basement transformations practical every day.
Finish with durable, affordable options like plastic resin bins and metal shelving that resist moisture, a key consideration for basement storage on a budget.
Question: What are easy DIY basement makeover tips for beginners with limited tools?
Start small with high-impact, low-cost changes. Paint the concrete walls and ceiling with bright, moisture-resistant paint to brighten the space—this is one of the most effective affordable home improvements for basements. Add DIY upcycled furniture like a coffee table from pallet wood and a sofa built from mismatched cushions to create a cozy sitting area.
Install simple, programmable LED lighting and use budget-friendly decor like fabric curtains to soften the room. Use removable wallpaper or stencils for an accent wall without committing to permanent changes. Keep tools minimal and reuse items wherever possible to make every project achievable.
Question: Which budget-friendly flooring options are best for unfinished basements?
Moisture-friendly and affordable options can totally transform the feel. For most basements, start with a sealed concrete look, then consider vinyl plank flooring or sheet vinyl with a built-in underlayment for durability and moisture resistance. If you need a softer surface, try carpet tiles that you can replace individually. Interlocking foam mats work well for play or workout zones and are easy to install. Always install a moisture barrier and check for damp before finishing. These affordable home improvements are practical ways to waterproof and transform unfinished floors without a big budget.
Question: How can I improve lighting in an unfinished basement on a budget to make it feel inviting?
Lighting is the fastest way to change the mood of an unfinished basement. Layer light with bright overhead LED fixtures, table lamps, and floor lamps to avoid dark corners. Use bulbs in the 4000–5000K range for a clean daylight feel that enhances basement makeover tips. Add string lights or inexpensive LED strips along shelving or ceiling edges for a cozy touch. Reflective surfaces, light paint, and creative storage solutions can bounce light around the space, making it feel larger and more welcoming—without breaking the bank.